Table of contents
- Lab Steps
- Task 1: Sign in to AWS Management Console
- Task 2: Create a service provider VPC
- Task 3: Create and attach an Internet Gateway
- Task 4: Create a Public subnet
- Task 5: Create a Public Route Table and associate it with the subnet
- Task 6: Add public Route in the Route table
- Task 7: Create an EC2 Instance
- Task 8: Create a Network LoadBalancer
- Task 9: Create an Endpoint service
- Task 10: Create a customer VPC
- Task 11: Create and attach an Internet Gateway
- Task 12: Create a Public subnet
- Task 13: Create a Public Route Table and associate it with the subnet
- Task 14: Add public Route in the Route table
- Task 15: Create an EC2 Instance
- Task 16: Create a VPC Endpoint
- Task 17: Test the connectivity
- Task 18: Validation of the lab
- Task 19: Delete AWS Resources
- Completion and Conclusion
- End Lab
Lab Steps
Task 1: Sign in to AWS Management Console
Click on the Open Console button, and you will get redirected to AWS Console in a new browser tab.
On the AWS sign-in page,
Leave the Account ID as default. Never edit/remove the 12 digit Account ID present in the AWS Console. otherwise, you cannot proceed with the lab.
Now copy your User Name and Password in the Lab Console to the IAM Username and Password in the AWS Console and click on the Sign in button.
Once Signed In to the AWS Management Console, Make the default AWS Region as US East (N. Virginia) us-east-1.
Task 2: Create a service provider VPC
Make sure you are in the N.Virginia Region.
Navigate to VPC by clicking on the Services menu in the top, then click on VPC in the Networking & Content Delivery section.
Navigate to Your VPCs on the left panel and click on the Create VPC.
Name tag: Enter Service_Network
IPv4 CIDR block: Enter 20.0.0.0/16
Leave everything else as default and click on the Create VPC.
You have successfully created the VPC

Task 3: Create and attach an Internet Gateway
Navigate to the Internet Gateways from the left side menu and click on the Create Internet Gateway.
- Name tag : Enter Service_IGW
- Click on the Create Internet Gateway.

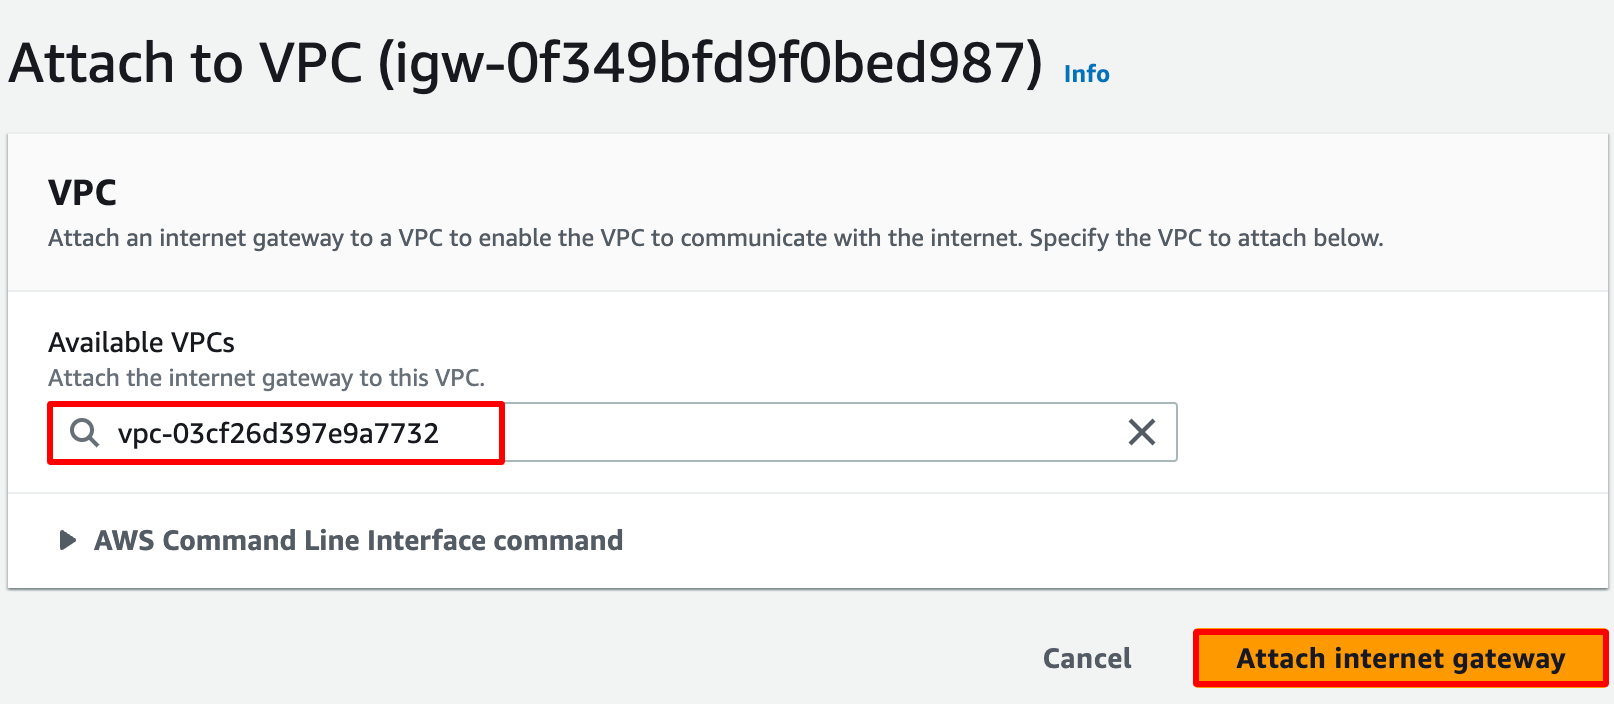
Now click on the Actions button and select Attach to VPC.
- Available VPCs: Select Service_Network from the list.
Now click on the Attach Internet Gateway.
Task 4: Create a Public subnet
Navigate to Subnets from the left side menu and click on Create Subnet.
VPC ID: Select the Service_Network VPC from the list.
Subnet name: Enter Service_Public_subnet
Availability Zone: Select us-east-1a
IPv4 CIDR block: Enter 20.0.1.0/24
Now click on the Create Subnet.

Task 5: Create a Public Route Table and associate it with the subnet
Navigate to Route Tables on the left side panel and click on the Create route table button.
Name tag : Enter Service_PublicRT
VPC*: Select the Service_Network from the list.
Now click on the Create Route Table.
Select the Service_PublicRT from the list and go to the Subnet Associations tab in below.
Click on the Edit Subnet Associations.
Now select the subnet and click on Save Associations.

Task 6: Add public Route in the Route table
Navigate to Route Tables on the left side panel and select the Service_PublicRT from the list.
Go to the Routes tab below and click on the Edit routes button.
Now click on the Add routes button.
Destination: Enter 0.0.0.0/0
Target: Select Internet Gateway and then select the Internet Gateway ID.

- Click on the Save Changes.
Task 7: Create an EC2 Instance
Make sure you are in the N.Virginia Region.
Navigate to EC2 by clicking on the Services menu in the top, then click on EC2 in the Compute section.
Navigate to Instances from the left side menu and click on the Launch Instances button.
Under the Name and tags section :
- Name: Webserver1

- Under the Application and OS Images (Amazon Machine Image) section :
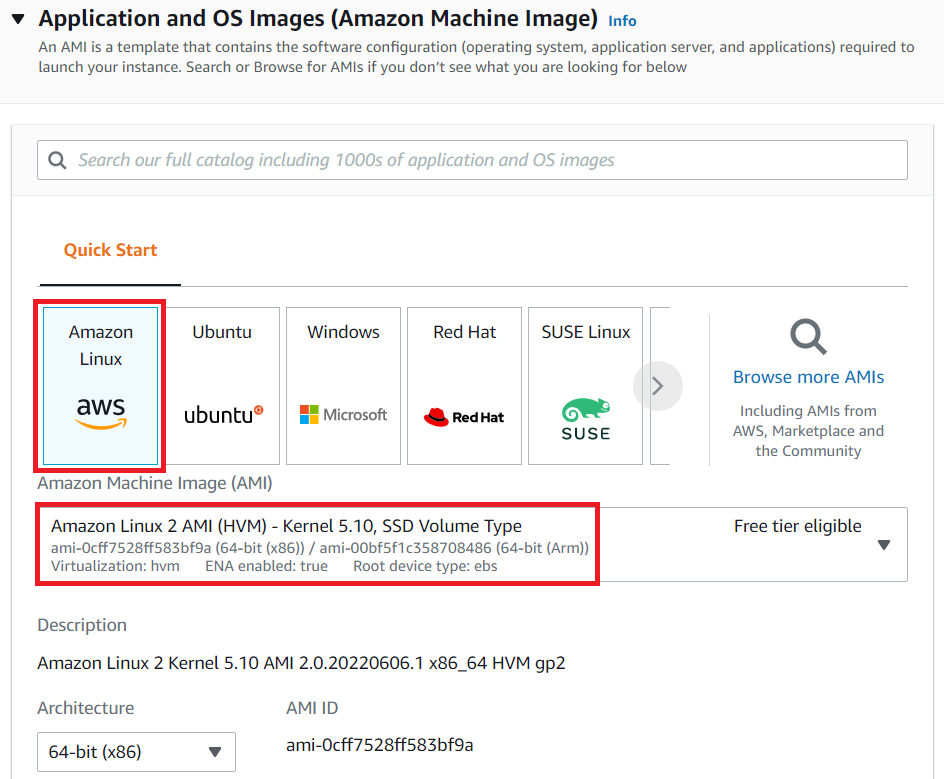
Select the Quick Start tab and Amazon Linux under it
Amazon Machine Image (AMI): select Amazon Linux 2 AMI
Note: If there are two AMIs present for Amazon Linux 2 AMI, choose any of them.
Under the Instance Type section :
- Instance Type: Select t2.micro

Under the Key Pair (login) section :
Click on Create new key pair hyperlink
Key pair name: public-key
Key pair type: RSA
Private key file format: .pem or .ppk
Click on Create key pair and select the created key pair

Under the Network Settings section :
Click on the Edit button
VPC: Select Service_Network from the list.
Subnet: Select Service_Public_subnet
Auto-assign public IP: Select Enable
Firewall (security groups): Select Create a new security group
Security group name: Enter Webserver_sg
Description: Enter Security group for Webserver
To add SSH:
Choose Type: SSH
Source: Anywhere (From ALL IP addresses accessible).
For HTTP, click on Add security group rule,
Choose Type: HTTP
Source: Anywhere (From ALL IP addresses accessible).
For HTTPS, click on Add security group rule,
Choose Type: HTTPS
Source: Anywhere (From ALL IP addresses accessible).


Under the Advanced details section :
- Under the User data: copy and paste the following script to create an HTML page served by an Apache httpd web server.
|
Keep everything else as default and click on the Launch instance button.
Launch Status: Your instance is now launching, Navigate to the Instances page from the left menu and wait until the status of the EC2 Instance changes to running.

Task 8: Create a Network LoadBalancer
Navigate to Load Balancers from the left side menu under Load balancing.
Click on the Create Load Balancer.
Select Load Balancer Type: Under the Network Load Balancer, click on the Create button.
The next five screens will require configuration modification from the default values provided. If a field is not mentioned, leave it as default or empty.
Configure Load Balancer:
Name: Enter MyNetwork-LB
Scheme: Select Internet facing
VPC: Select Service_Network
security group: select Webserver_sg.
Availability zones: Select the us-east-1 checkbox
Listeners:
Load Balancer Protocol: Select TCP
Load Balancer Port: Choose 80
Tags
Key: Enter Name
Value: Enter MyNetwork-LB
Click on Create target group, it will open it in new tab
Create Target Group:
Target Group:
Target Type: Select Instance
Name: Enter MyNetwork-TG
Port: Enter 80
Protocol: Choose TCP
Advanced health check settings: Select Interval as 10 Seconds.
Click on Next.
Now choose the instance Webserver1 from the above step and then click Include as pending below.
Click on Create Target Group
Go back to the Network load balancer page and then select the MyNetwork-TG in the default section of the listeners
Click on Create load balancing
Now navigate to the Target Groups from the left side menu under Load balancing.

Now select the Targets tab and wait till the targets become healthy (Important).
Now again navigate to Load Balancers from the left side menu under Load balancing.
Select the MyNetwork-LB Load Balancer and copy the DNS name under the Description tab.
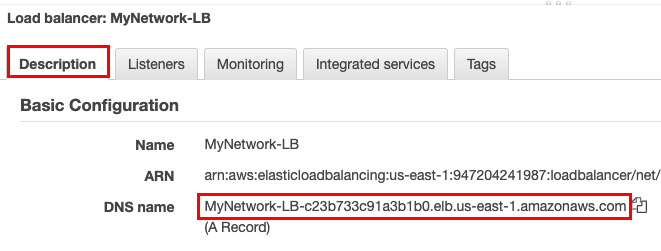
Paste the DNS name in your browser and hit [Enter] and you will be able to see the webpage.
Paste the DNS name in your browser and hit [Enter] and you will be able to see the webpage.

Task 9: Create an Endpoint service
Make sure you are in the N.Virginia Region.
Navigate to VPC by clicking on the Services menu in the top, then click on VPC in the Networking & Content Delivery section.
Select Endpoint Services under Virtual Private Cloud.
Click on the Create Endpoint Service.
- Associate Load Balancers: Check the MyNetwork-LB checkbox from the list.
Require acceptance for endpoint: Make sure this is selected Acceptance required
Note: By enabling the Acceptance option, for every customer who creates the vpc endpoint using this Endpoint Service, the service provider needs to accept the connection.
Click on the Create button.
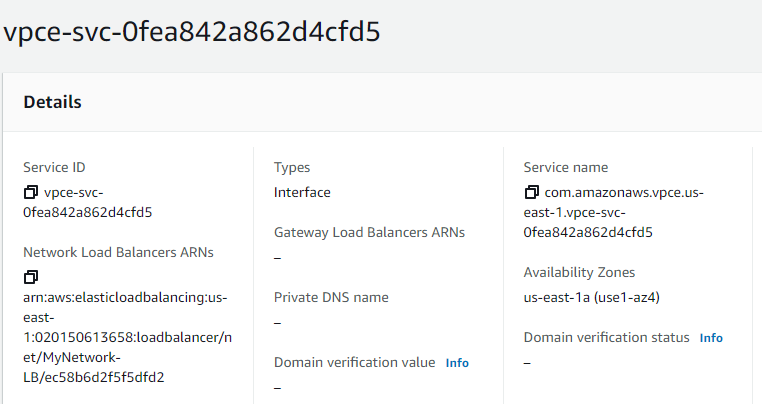
Once the Endpoint service is created, under the Details, table copy the Service name and place it in your text editor. We will be using this Service name to create the VPC Endpoint.
Task 10: Create a customer VPC
Make sure you are in the N.Virginia Region.
Navigate to Your VPCs on the left panel and click on the Create VPC.
Name tag : Enter Customer_Network
IPv4 CIDR block: Enter 10.0.0.0/16
Leave everything else as default and click on the Create VPC.
You have successfully created the VPC

Task 11: Create and attach an Internet Gateway
Navigate to the Internet Gateways from the left side menu and click on the Create Internet Gateway.
- Name tag: Enter Customer_IGW
Click on the Create Internet Gateway.

Now click on the Actions button and select Attach to VPC.
- Available VPCs: Select Customer_Network from the list.
Now click on the Attach Internet Gateway.

Task 12: Create a Public subnet
Navigate to Subnets from the left side menu and click on Create Subnet.
VPC ID: Select the Customer_Network VPC from the list.
Subnet name: Enter Customer_Public_subnet
Availability Zone: Select us-east-1a
IPv4 CIDR block: Enter 10.0.1.0/24
Now click on the Create Subnet.

Task 13: Create a Public Route Table and associate it with the subnet
Navigate to Route Tables on the left side panel and click on the Create route table button.
Name tag: Enter Customer_PublicRT
VPC*: Select the Customer_Network from the list.
Now click on the Create Route Table.
Select the Customer_PublicRT from the list and go to the Edit subnet association tab below.
Now select the subnet and click on Save Associations.

Task 14: Add public Route in the Route table
Navigate to Route Tables on the left side panel and select the Customer_PublicRT from the list.
Go to the Routes tab below and click on the Edit routes button.
Now click on the Add routes button.
Destination: Enter 0.0.0.0/0
Target: Select Internet Gateway and then select the Internet Gateway id.

- Click on the Save changes button.
Task 15: Create an EC2 Instance
Make sure you are in the N.Virginia Region.
Navigate to EC2 by clicking on the Services menu in the top, then click on EC2 in the Compute section.
Navigate to Instances from the left side menu and click on the Launch Instances button.
Under the Name and tags section :
- Name: Customer_EC2

Under the Application and OS Images (Amazon Machine Image) section :
Select the Quick Start tab and Amazon Linux under it
Amazon Machine Image (AMI): select Amazon Linux 2 AMI
Note: If there are two AMIs present for Amazon Linux 2 AMI, choose any of them.

Under the Instance Type section :
- Instance Type: Select t2.micro

Under the Key Pair (login) section :
- Key pair name: Select public-key

Under the Network Settings section :
Click on the Edit button
VPC: Select Customer_Network from the list.
Subnet: Select Customer_Public_subnet
Auto-assign public IP: Select Enable
Firewall (security groups): Select Create a new security group
Security group name: Enter Customer_EC2_SG
Description: Enter Security group for Customer EC2
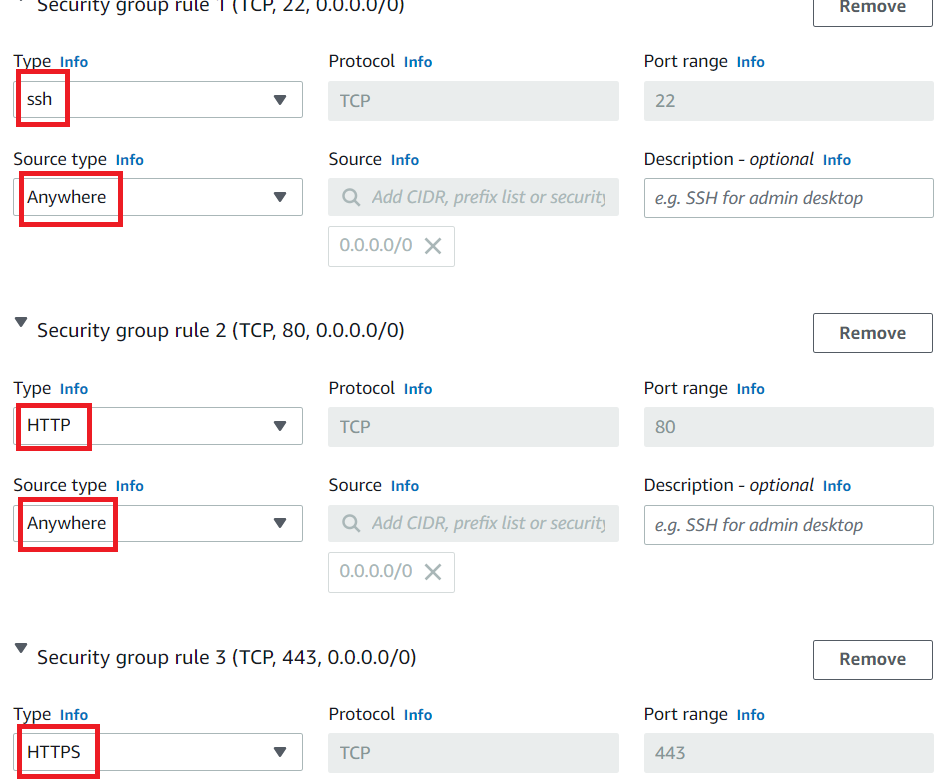
To add SSH:
Choose Type: SSH
Source: Anywhere (From ALL IP addresses accessible).
For HTTP, click on Add security group rule,
Choose Type: HTTP
Source: Anywhere (From ALL IP addresses accessible).
For HTTPS, click on Add security group rule,
Choose Type: HTTPS
Source: Anywhere (From ALL IP addresses accessible).

Keep everything else as default and click on the Launch instance button.
Launch Status: Your instance is now launching, Navigate to the Instances page from the left menu and wait until the status of the EC2 Instance changes to running.

- Note down the sample IPv4 Public IP Address of the EC2 instance and place it in your text editor. A sample is shown in the screenshot below.

Task 16: Create a VPC Endpoint
Navigate to VPC by clicking on the Services menu in the top, then click on VPC in the Networking & Content Delivery section.
Select Endpoints under Virtual Private Cloud.
Click on the Create endpoint button.
Service category: Select Other endpoint services
Service Name: Paste the Service name that you copied and placed in your text editor.
Click on the Verify service button and you will get a Service name verified message.
VPC*: Select Customer_Network from the list.
Subnets: Select the us-east-1a Availability Zone
IP address type: IPv4
Security group: select the Customer_EC2_SG from the list.
Now click on the Create Endpoint button.
Now the status of your endpoint will be in pending acceptance status.

Now navigate back to Endpoint Service under Virtual Private Network.
Select the Endpoint Service and select the Endpoint Connections tab from below.
Click on the Action button and select Accept Endpoint Connection request

Type accept and then click on Accept
Now again navigate back to Endpoints and your endpoint will be in pending status. It will take 3 to 4 Min to become the status as available. Wait till the Status becomes available.
Task 17: Test the connectivity
Select the Endpoint that you have created and select the Subnets tab from below.
Copy the IPv4 Addresses and place them in your text editor.

Please follow the steps to SSH to Customer_EC2, SSH into EC2 Instance.
Once you have successfully SSH into EC2, run the following commands :
Switch to root user :
sudo -s
Run curl command to the IPv4 Address
Syntax : curl <IPv4 Address>
Example: curl 10.0.1.136
You will be able to get the Web Server output from the Network Load balancer.

Do You Know?
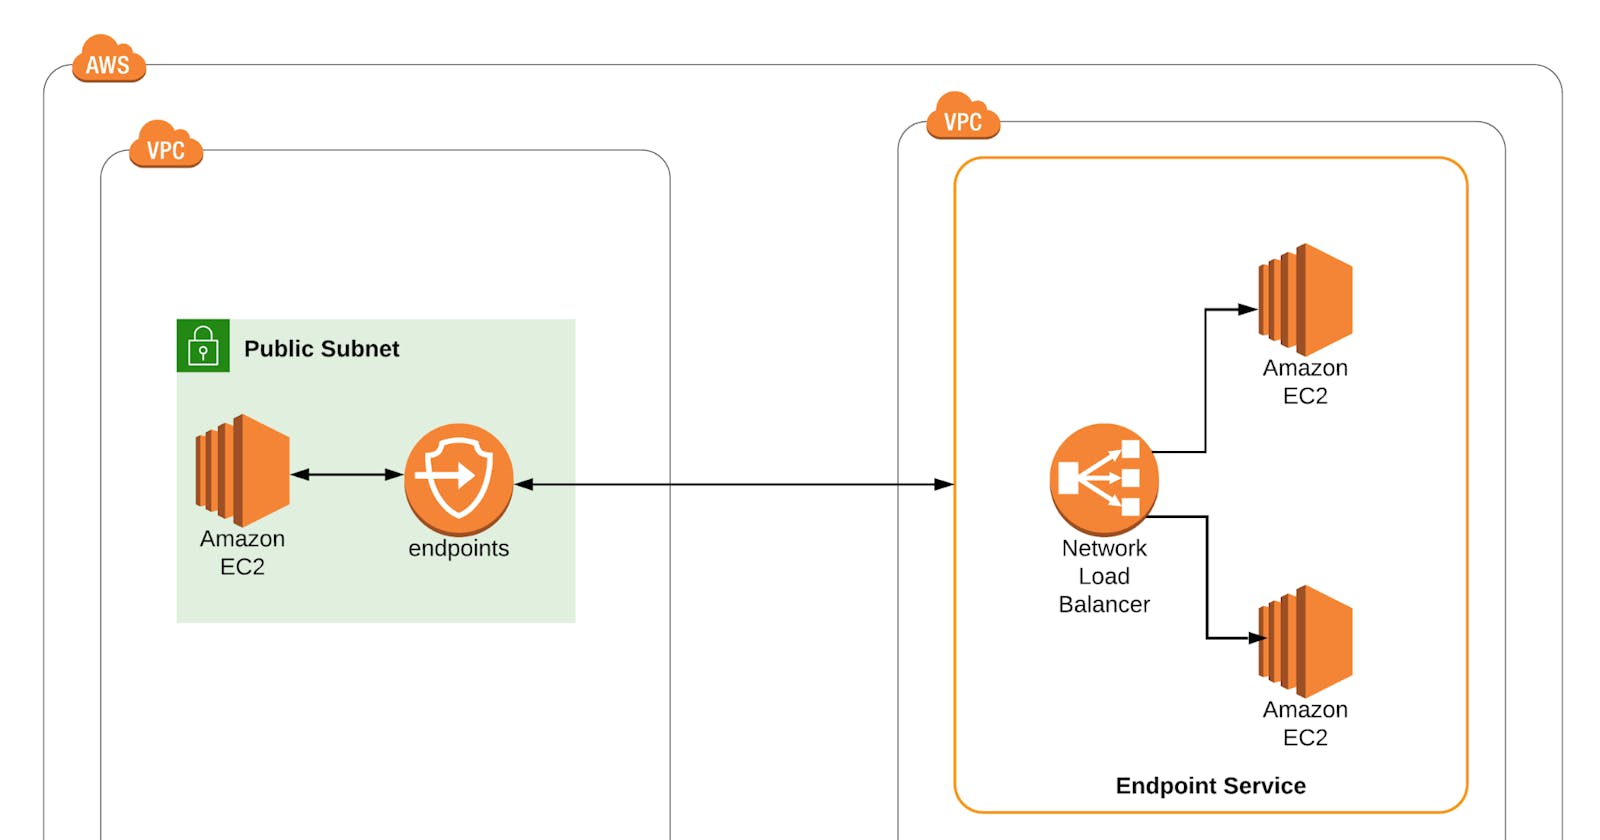
Implementing an end-to-end VPC Endpoint service involves a comprehensive configuration that enables secure and private communication between resources within a Virtual Private Cloud (VPC) and AWS services. This setup is particularly useful when you want to access AWS services like S3, DynamoDB, or Kinesis privately, without using public internet connectivity.
Task 18: Validation of the lab
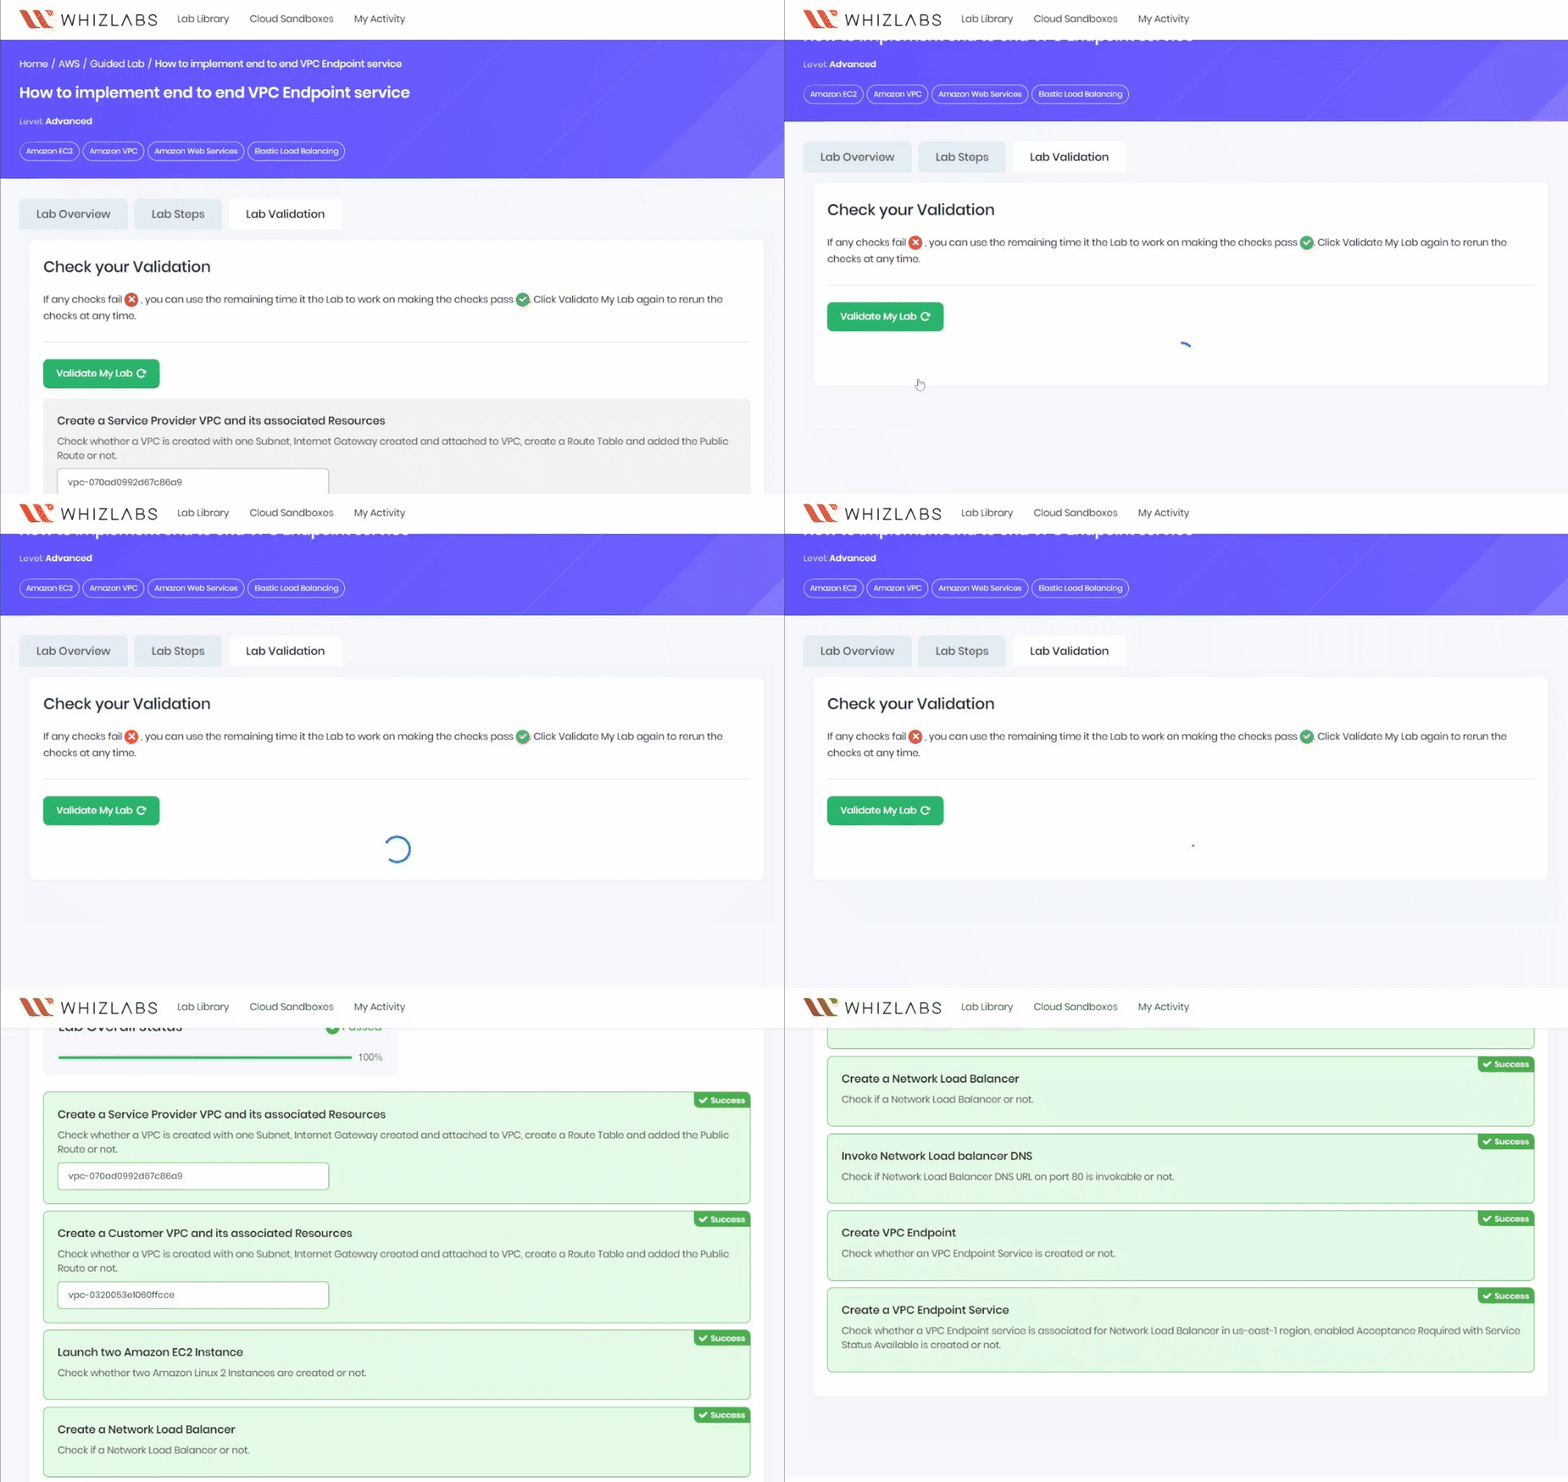
Once the lab steps are completed, please click on the Validation button on the right side panel.
This will validate the resources in the AWS account and display whether you have completed this lab successfully or not.
Sample output :
Task 19: Delete AWS Resources
Delete EC2 Instance
Make sure you are in the US East (N. Virginia) Region.
Navigate to EC2 by clicking on the Services menu in the top, then click on EC2 in the Compute section.
Now select the EC2 instance that you have created and click on Instance State and then click on the Terminate option.
Click on the Terminate button and your EC2 will start terminating.
Now delete the other two EC2 Instances also.
Delete VPC EndPoint
Navigate to VPC by clicking on the Services menu in the top, then click on VPC in the Networking & Content Delivery section.
Select Endpoints under Virtual Private Network.
Select the Endpoint that you have created.
Click on the Action button and select Delete Endpoint.
Click on the Yes, delete button to confirm the deletion.
Delete Endpoint service
Now navigate to Endpoint Service under Virtual Private Network.
Select the Endpoint service that you have created.
Click on the Action button and click on Delete service endpoint
Type delete and then click on Delete.
Delete Elastic LoadBalancer and Target Group
In the EC2 console, navigate to Load Balancers in the left-side panel.
MyNetwork-LB will be listed here.
To delete the load balancer, need to perform the following actions:
Select the load balancer,
Click on the Actions button,
Select the Delete option.
- Confirm by clicking on the Yes, Delete button when a pop-up is shown.
MyNetwork-LB will be deleted immediately.
In the EC2 console, navigate to Target Groups in the left-side panel.
MyNetwork-TG will be listed here.
To delete the target group, need to perform the following actions:
Select the target group,
Click on the Actions button,
Select the Delete option
Now click on the Yes, delete button to confirm deletion.
MyNetwork-TG will be deleted immediately.
Completion and Conclusion
You have successfully created a Service provider VPC.
You have successfully created and attached an Internet Gateway.
You have successfully created a Public subnet.
You have successfully created a Public Route Table and associated it with the subnet.
You have successfully added the public Route in the Route table.
You have successfully created an EC2 Instance.
You have successfully created a Network LoadBalancer.
You have successfully created an Endpoint service.
You have successfully created a customer VPC.
You have successfully created and attached an Internet Gateway.
You have successfully created a Public subnet.
You have successfully created a Public Route Table and associated it with the subnet.
You have successfully added the public Route in the Route table.
You have successfully created an EC2 Instance.
You have successfully created a VPC Endpoint.
You have successfully tested the connectivity.
End Lab
Sign out of AWS Account.
You have successfully completed the lab.
